Learn how to set up a smart home dashboard on a tablet. From choosing hardware to advanced UI design, build a central hub for Home Assistant or Hubitat.
TL;DR: Converting a tablet into a dedicated smart home dashboard requires the right mix of mounting hardware, power management, and software like Home Assistant or Fully Kiosk Browser. This guide covers everything from choosing a flicker-free display to designing a UI that your family will actually use.
| Software Platform | Best For | Difficulty | Cost |
| Home Assistant (Lovelace) | Power Users | High | Free |
| SharpTools | Ease of Use | Medium | Subscription |
| ActionTiles | SmartThings focus | Low | One-time fee |
| Fully Kiosk Browser | Android Lockdown | Low | Licensed |
Why You Need a Dedicated Smart Home Dashboard on a Tablet
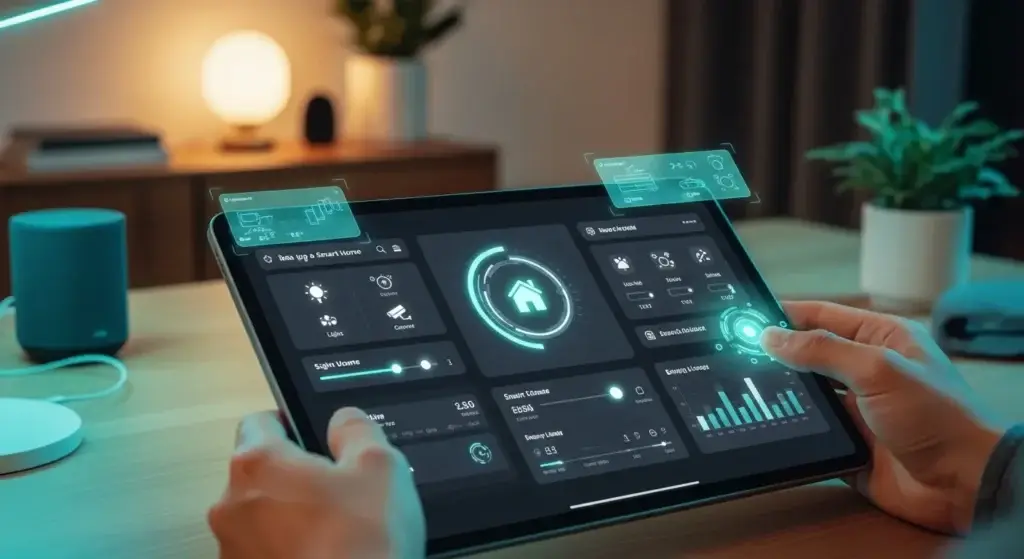
A smart home dashboard on a tablet provides a centralized, persistent interface for controlling lights, security cameras, and climate. It consolidates multiple apps into one visual hub, typically using software like Home Assistant or SharpTools, mounted in a high-traffic area to improve accessibility for all household members.
A smart home dashboard on a tablet serves as the physical ‘brain’ of your house. While voice assistants are great for quick toggles, they fail at providing a high-level overview of security cameras, energy usage, and climate data. I’ve found that mounting a dedicated screen in a high-traffic area like the kitchen significantly increases ‘Wife Acceptance Factor’ (WAF). It transforms a complex ecosystem of apps into a single, intuitive interface. In 2026, we are moving away from tiny phone screens toward these centralized hubs that offer persistent visibility into our home’s health and safety status.
People Also Ask
Q: Is an iPad or Android better for a smart home dashboard?
A: Android is generally superior due to the ‘Fully Kiosk Browser’ app, which allows deep control over the screen and camera for wake-on-motion features.
Selecting the Right Tablet Hardware for 2026
The best tablet for a smart home dashboard is the Samsung Galaxy Tab A8 or Lenovo Tab M10 for Android, or an iPad Air for iOS users. Prioritize IPS displays for wide viewing angles and ensure the device supports modern web standards for smooth dashboard rendering.
Don’t just buy the cheapest fire tablet available. For a professional smart home dashboard on a tablet, you need a screen with wide viewing angles (IPS or OLED) so it’s readable from the side. I recommend the Samsung Galaxy Tab A series or the Lenovo Tab M10 for Android users. If you are an Apple-only house, an iPad Air with a thin bezel is the way to go. Look for tablets that support ‘Ambient Mode’ or have reliable proximity sensors. Avoid old tablets with bloated batteries or screens with significant ghosting, as the dashboard will likely stay on for hours at a time.
People Also Ask
Q: Can I use an old Kindle Fire for a dashboard?
A: Yes, but you will likely need to strip the Amazon software using Fire Toolbox to install a proper kiosk browser for a better experience.
Top Dashboard Software and Operating Systems
Top software for a smart home tablet dashboard includes Home Assistant for deep customization, SharpTools for ease of use, and Fully Kiosk Browser for locking Android devices into a dedicated ‘kiosk’ mode that prevents accidental app switching.
The software is what makes or breaks your experience. Home Assistant remains the gold standard for enthusiasts, offering unparalleled customization via Lovelace cards. If you want something ‘plug and play,’ SharpTools is a fantastic web-based editor that works across many hubs. For those on the SmartThings ecosystem, ActionTiles is a classic choice. On Android, you MUST install Fully Kiosk Browser. This app allows you to lock the tablet to a specific URL, hide the status bar, and even use the front-facing camera as a motion sensor to wake the screen when you walk by.
People Also Ask
Q: What is the easiest smart home dashboard app?
A: SharpTools is widely considered the easiest because it features a drag-and-drop interface and connects directly to hubs like Hubitat and SmartThings.
How to Mount Your Tablet to the Wall Safely
To mount a smart home tablet, use a 3D-printed surface mount or a recessed flush mount. Use a slim 90-degree USB cable to hide wiring, and ensure the mount allows for adequate ventilation to prevent the tablet from overheating during constant use.
Mounting is where most DIY projects look messy. You have two main options: recessed mounts or surface mounts. A recessed mount (like quelli from iPort) hides the tablet flush with the drywall for a high-end look but requires cutting into your wall. Surface mounts, like those from MakesByMike, are easier to install and often include 3D-printed frames that hide the charging cable. Pro tip: Use a 90-degree USB-C ribbon cable to keep the profile slim. Ensure you aren’t mounting it in direct sunlight, which will cause the tablet to overheat and the battery to swell over time.
People Also Ask
Q: How do you hide the wires for a wall-mounted tablet?
A: Run a low-voltage USB cable behind the drywall to a recessed outlet or use a Power over Ethernet (PoE) splitter found in the wall cavity.
Solving the Perpetual Power Problem
Prevent battery swelling on your smart home tablet by using a smart plug to cycle power between 20% and 80% charge. Avoid keeping the device at 100% constant charge, as this degrades the battery and poses a safety risk over long periods.
Leaving a tablet plugged in 24/7 is a fire hazard and will destroy the battery within a year. To do this right, use a smart plug or a specialized PoE (Power over Ethernet) to USB converter. Set an automation in your hub to turn on the power when the tablet hits 20% and off when it hits 80%. This ‘battery cycling’ mimics natural use and keeps the lithium-ion cells healthy. Alternatively, some newer tablets have a ‘Battery Protect’ mode in settings that limits the charge to 85%—enable this immediately if you aren’t using a smart automation to manage the power flow.
People Also Ask
Q: Can I run a tablet without a battery for a dashboard?
A: Most tablets require a battery to complete the circuit, but some advanced users solder a dc-to-dc buck converter directly to the battery terminals.
UI Design Principles for a Family-Friendly Hub
Design your smart home UI using the ‘two-tap rule’: every primary function should be accessible within two touches. Use high-contrast icons, color-coded categories, and clear typography to ensure the dashboard remains glanceable and usable for guests.
Effective dashboard design is about restraint. Don’t put every single light switch on the home screen. Build a ‘Home’ tab with high-frequency items: weather, front door camera, and the ‘All Off’ button. Use Mushroom Cards in Home Assistant for a tactile, mobile-first look. I recommend color-coding your tiles yellow for lights, blue for climate, and red for security. Make sure icons are large enough to hit while walking past. If a guest can’t figure out how to turn on the kitchen lights within five seconds of looking at your smart home dashboard on a tablet, your UI is too complex.
People Also Ask
Q: What are the best icons for a smart home dashboard?
A: Material Design Icons (MDI) are the standard for most platforms and offer a consistent, recognizable look for all home device types.
Practical Use-Case Recommendations
- The Busy Parent: Use a 10-inch Android tablet with a shared family calendar and a one-tap ‘School Mode’ scene.
- The Security Enthusiast: Focus on a Home Assistant build with Frigate integration for real-time AI object detection on the main screen.
- The Minimalist Homeowner: A flush-mounted iPad Mini running a simplified HomeKit dashboard in Kiosk mode.
- The Energy Saver: Integrate SharpTools with real-time solar production and smart meter data as the primary visual element.
Conclusion
Setting up a smart home dashboard on a tablet is more than just a tech project; it’s about creating an accessible anchor for your digital life. By choosing the right Android-based hardware, leveraging Fully Kiosk Browser, and strictly managing your battery health with smart charging, you create a hub that is both safe and powerful. Remember the two-tap rule: if your UI is too cluttered, people won’t use it. Start with a minimalist approach, focusing on high-value interactions like security and lighting. As we move further into 2026, these centralized tablet hubs will become the expectation, not the exception, in automated homes. Take the time to mount it properly and wire it safely—your future self will thank you for the convenience of a truly glanceable home command center.
Frequently Asked Questions
Q: Can I use an iPad for a Home Assistant dashboard?
A: Yes, the Home Assistant app for iOS is excellent, but you lack the ‘wake-on-motion’ camera features that Android’s Fully Kiosk Browser provides.
Q: How do I prevent the screen from burning in?
A: Use a screensaver that moves or dims the brightness after a period of inactivity. Modern IPS panels are less prone to burn-in than OLEDs.
Q: Is it worth buying a dedicated device like the NSPanel Pro instead?
A: Dedicated panels are easier but smaller. A 10-inch tablet provides significantly more room for camera feeds and complex controls.
Q: Does the tablet need to be high-performance?
A: No, it just needs enough RAM (4GB+) to render a web page smoothly. Most dashboards are essentially just browser windows.
Q: How much does a DIY tablet dashboard cost?
A: Excluding the tablet, expect to spend $50-$100 on a mount, high-quality cable, and software licenses.

I am Ethan Brooks is an author dedicated to exploring sustainability, technology, and forward-thinking solutions. His writing highlights simple yet powerful ways to improve everyday life while protecting the planet. He believes knowledge can drive meaningful change. Discover more at ecopowersence.com.