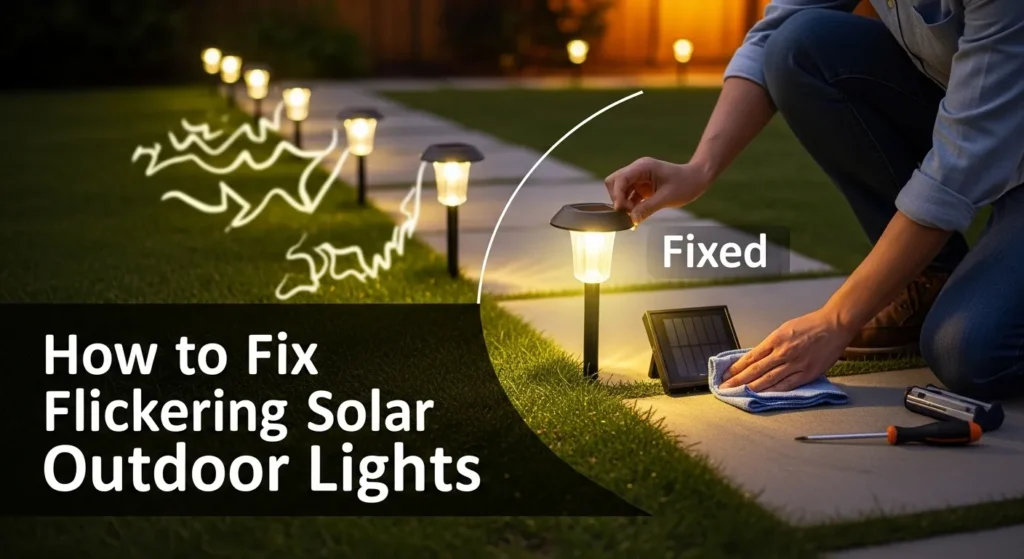
Solar outdoor lights are brilliantly simple until they start flickering. That annoying strobe effect drains your patience and signals a real underlying issue. Fortunately, most flickering problems are fixable within 30 minutes, without tools or professional help.
This pro-level troubleshooting guide breaks down every root cause. Furthermore, it delivers step-by-step fixes ranked from the most common to the most complex. By the end, your lights will shine steadily and you’ll know how to keep them that way.
How Solar Outdoor Lights Actually Work
Before diagnosing flickering, you must understand what’s happening inside your fixture. Solar lights are deceptively sophisticated systems with four tightly interdependent components.
The 4 Core Components
Every solar outdoor light contains:
- A photovoltaic (PV) solar panel converts sunlight into DC electricity during the day
- A rechargeable battery stores that converted energy for nighttime use
- A light sensor (LDR or PIR) detects darkness and triggers the LED to activate
- An LED driver/controller circuit regulates voltage from the battery to the LED
When any one of these components underperforms, the entire system stutters. Consequently, flickering is rarely random it’s a symptom with a traceable cause. According to theU.S. Department of Energy’s Solid-State Lighting Program, LED outdoor systems can deliver up to 569 TWh in annual energy savings by 2035 but only when components are properly maintained.
Why Solar Lights Flicker: 6 Root Causes Diagnosed
Understanding the cause is 80% of the fix. Below are the six most common culprits, ranked by frequency.
1. Dead or Degraded Battery (Most Common 60–70% of Cases)
The battery is the single most common cause of flickering solar lights. Rechargeable NiMH batteries degrade after approximately 2–3 years of charge cycles. LiFePO4 batteries last longer typically 5–7 years but they too eventually lose capacity.
When a battery can no longer hold a full charge, it delivers inconsistent voltage to the LED. This inconsistency manifests as flickering, especially in the first and last hours of operation. Additionally, batteries exposed to extreme heat or freezing temperatures degrade significantly faster than normal.
Key symptom: Lights flicker within 1–2 hours of sunset, even after a sunny day.
2. Dirty or Obstructed Solar Panel
A grimy solar panel charges your battery poorly. Dust, bird droppings, pollen, and hard water deposits act as light-blockers. Consequently, even 6–8 hours of sunlight exposure produces only a partial charge.
A partially charged battery simply cannot power the LED at a stable voltage for a full night. Furthermore, panels shaded by tree branches, roof overhangs, or nearby structures compound this problem dramatically.
Key symptom: Lights perform well in summer but flicker heavily in overcast or dusty conditions.
3. Faulty or Confused Light Sensor
Solar lights use a Light Dependent Resistor (LDR) to detect darkness and activate the LED. When this sensor is dirty, cracked, or positioned near artificial light sources (porch lights, streetlamps), it receives contradictory signals.
As a result, the sensor toggles the LED on and off erratically exactly mimicking a flicker. Similarly, motion-sensor (PIR) models can trigger falsely due to heat sources, passing cars, or animals, creating an apparent flicker pattern.
Key symptom: Lights turn on during the day, or flash at seemingly random intervals at night.
4. Loose or Corroded Wiring
Internal wiring connections loosen over time due to vibration, thermal expansion and contraction, and simple wear. A loose wire creates an intermittent circuit current flows inconsistently, producing that telltale flicker.
Corrosion on battery terminals or connector pins is equally problematic. Oxidized metal dramatically increases electrical resistance, forcing the LED driver to work harder with less consistent power. AsPacLights’ solar troubleshooting analysis confirms, loose or corroded connections are a leading cause of inconsistent solar light performance.
Key symptom: Lights flicker intermittently but otherwise look undamaged externally.
5. Moisture & Water Ingress
Water is the silent destroyer of solar light electronics. Even fixtures rated for outdoor use can develop cracked seals or compromised gaskets over time. Once moisture enters the housing, it corrodes circuit board solder joints, battery terminals, and LED contacts.
The result is erratic, flickering performance that worsens progressively. Non-weatherproof models fail up to 3x faster in rainy or humid climates. Consequently, theDOE Better Buildings Outdoor Lighting Accelerator consistently emphasizes weatherproofing standards as a foundational factor in long-term outdoor lighting reliability.
Key symptom: Flickering began or worsened after heavy rain, humid weather, or a seasonal change.
6. LED Driver or Controller Failure
The charge controller regulates voltage between the solar panel, battery, and LED. When it malfunctions, it delivers unstable power causing rapid, uncontrolled flickering. Voltage fluctuations from a defective controller can also cause premature LED burnout over time.
This is the least common cause, but the hardest to fix without component-level knowledge. In practice, a failed controller typically means replacing the entire unit.
Key symptom: Flickering persists even after a new battery is installed and panel is clean.
Tools You Need Before You Start
Gather these tools before opening any fixture. They handle 95% of all solar light repairs.
| Tool | Purpose |
| Digital Multimeter | Test battery voltage (1.2V NiMH / 3.2V LiFePO4) and circuit continuity |
| Isopropyl Alcohol (90%+) | Clean solar panels, battery terminals, and sensor lenses |
| Soft Microfiber Cloth | Panel and lens cleaning without scratching |
| Phillips & Flathead Screwdrivers | Open housing on most solar light models |
| Silicone Sealant (Clear, UV-resistant) | Reseal cracked housings and weatherproof gaskets |
| Pencil Eraser or Fine Sandpaper | Remove terminal corrosion gently |
| Dielectric Grease | Protect cleaned terminals from future oxidation |
| Replacement NiMH or LiFePO4 Batteries | Match voltage and mAh rating of originals |
Pro Tip: Always work during daylight hours. Covering the light sensor during repair prevents accidental activation and draining.
Step-by-Step Fix Guide: Ranked by Probability
Follow these steps in sequence. Most flickering issues resolve by Step 3.
Step 1 Test and Replace the Battery
This single step resolves over 60% of all flickering complaints. Start here.
How to Do It
- Open the battery compartment (usually accessed from the base or underside).
- Note the battery type, voltage, and mAh rating printed on the cell.
- Use your multimeter to test voltage. A healthy NiMH cell reads 1.2V fully charged; below 1.0V indicates failure.
- Replace with a rechargeable NiMH or LiFePO4 battery of identical voltage and equal or higher mAh.
- Never substitute standard alkaline AA batteries they cannot recharge and may damage the circuit.
Battery Replacement Schedule
- NiMH batteries: Replace every 2 years
- LiFePO4 batteries: Replace every 5–7 years (up to 2,000 charge cycles)
- Cold climates: Store lights indoors during freezing temperatures to preserve battery chemistry
After installation, allow the light to charge for 2 full days of direct sun before testing performance.
Step 2 Deep Clean the Solar Panel
A clean panel is a charging panel. This fix is free and takes under 5 minutes.
How to Do It
- Wipe the panel surface with a damp microfiber cloth to remove loose debris.
- Apply isopropyl alcohol to the cloth and scrub firmly in circular motions.
- Remove hard water deposits using a diluted white vinegar solution.
- Dry completely with a clean cloth.
- Inspect for cracks or delamination a physically damaged panel needs replacement.
Placement Optimization
After cleaning, evaluate your light’s position. The panel needs direct, unobstructed sunlight for a minimum of 6 hours daily. Furthermore, repositioning a shaded light to a sunnier location often resolves persistent flickering without any other intervention.
Step 3 Calibrate and Reset the Light Sensor
A confused sensor creates a convincing flicker. Resetting it often resolves the problem immediately.
Quick Sensor Test
Cover the sensor completely with your hand or opaque tape for 30–60 seconds. If the LED activates and stops flickering, the sensor is receiving conflicting ambient light signals not malfunctioning internally.
How to Reset It
- Switch the light to OFF using the physical switch.
- Remove the batteries completely.
- Wait 15 minutes to discharge any residual capacitor charge.
- Reinstall batteries and switch back to ON.
- Cover the sensor again and observe steady illumination confirms a successful reset.
Sensor Relocation Tip
If your solar light is positioned near a porch bulb, streetlamp, or security floodlight, that artificial light source confuses the LDR. Consequently, moving the fixture at least 3–4 meters away from competing light sources often permanently resolves sensor-related flickering.
Step 4 Inspect and Repair Internal Wiring
If Steps 1–3 didn’t resolve the flicker, it’s time to open the housing.
How to Do It
- Remove all screws from the housing carefully. Take a photo before disassembly to reference wire routing.
- Inspect all wire connections for looseness, fraying, or disconnection.
- Check battery terminals and connector pins for green or white corrosion deposits.
- Clean corroded terminals with a pencil eraser, then apply a thin layer of dielectric grease.
- Press all connectors firmly back into their ports and reseat the battery.
- Reassemble carefully, ensuring no wires are pinched.
Safety Note: If you see blackened PCB areas or melted plastic near the circuit board, do not attempt repair. Replace the unit entirely.
Step 5 Address Moisture and Water Ingress
Water damage worsens progressively. Act quickly when moisture is detected.
How to Do It
- Open the housing and inspect the interior for condensation, rust, or water stains.
- Remove the battery and circuit board carefully if accessible.
- Dry all components thoroughly using a hairdryer set to low heat keep it moving to avoid thermal damage.
- Allow the unit to air dry for 24–48 hours in a warm, dry location.
- Reseal all housing joints using clear, UV-resistant silicone sealant before reassembly.
- Optionally, drill a 1/8-inch drainage hole at the base of the housing to prevent future water pooling.
Prevention Going Forward
When purchasing replacements or new units, prioritize fixtures rated IP65 or higher. As confirmed byPacLights’ engineering best practices for solar lighting, IP65 or above is the industry-recommended minimum for reliable outdoor applications. IP67-rated fixtures offer submersion resistance and are ideal for rainy climates.
Step 6 Diagnose LED and Charge Controller Failure
This is the advanced step reserved for persistent flickering that survived every previous fix.
LED Failure Signs
- Light appears yellowish or noticeably dimmer rather than bright white
- Flickering is rapid and uniform, not erratic
- LED lifespan: typically 25,000–50,000 hours, but voltage fluctuations shorten this considerably
Test LED continuity using your multimeter in diode mode. A functional LED produces a small voltage reading. Alternatively, zero reading indicates an open (failed) LED.
Charge Controller Failure Signs
- Battery tests healthy but flickering persists
- Voltage output to the LED is unstable (measure with multimeter at LED input terminals)
- Light behaves erratically regardless of charge level
In most consumer-grade solar fixtures, the charge controller is integrated into the main PCB. Replacing the PCB is rarely cost-effective. At this point, replacement of the full unit is the practical choice.
Preventive Maintenance Schedule
Consistent maintenance extends solar light life by 2–3 years. Follow this simple schedule:
Monthly
- Wipe solar panels clean with a damp cloth
- Check for debris or spider webs blocking the sensor lens
- Confirm lights are activating at dusk and deactivating at dawn
Every 6 Months
- Deep clean panels with isopropyl alcohol
- Inspect housing seals for cracking or gaps; reseal as needed
- Test battery voltage with a multimeter
Annually
- Replace NiMH batteries proactively (or every 2 years at minimum)
- Inspect all wiring connections and apply fresh dielectric grease to terminals
- Evaluate panel placement for seasonal shadow changes from trees or structures
Seasonally (Cold Climates)
- Remove lights before the first hard freeze; store batteries indoors
- Clean panels after winter thaw before reinstalling
- Reposition lights to compensate for lower winter sun angles
Repair vs. Replace: How to Decide
Not every flickering solar light deserves a repair. Use this decision framework:
Repair When:
- The light is less than 3 years old
- Fix cost (battery + sealant) stays below 50% of a new unit’s price
- The solar panel, housing, and wiring are structurally intact
- A single component (battery or sensor) is clearly at fault
Replace When:
- The circuit board is blackened, corroded, or shows burn marks
- The housing is cracked and no longer weather-resistant
- Flickering persists after completing all 6 steps above
- The fixture lacks an IP65+ rating and has repeatedly failed due to moisture
When replacing, upgrade to fixtures featuring MPPT (Maximum Power Point Tracking) charge controllers and LiFePO4 batteries. Modern LED fixtures now achieve over 100 lumens per watt efficiency, with premium models exceeding 200 lm/W making upgrades genuinely worthwhile. According tocomprehensive 2025 solar lighting system data, modern monocrystalline panels achieve 20–24% efficiency, ensuring faster and more reliable charging than older polycrystalline models.
Frequently Asked Questions
Q: Can I use regular AA batteries to fix flickering solar lights?
No. Standard alkaline batteries cannot recharge using solar energy. They will damage the charging circuit and potentially leak inside the housing. Always use rechargeable NiMH (1.2V) or LiFePO4 batteries matched to your fixture’s specifications.
Q: How long should solar outdoor lights stay on each night?
A fully charged solar light should operate for 6–10 hours. Runtime under 4 hours strongly indicates a degraded battery or an underperforming solar panel.
Q: Why do my solar lights flicker only in winter?
Winter reduces solar charging efficiency significantly. In northern climates, solar energy production drops to 30–50% of summer levels. Consequently, partially charged batteries deliver unstable voltage, causing flickering. Replacing with a higher-mAh battery and ensuring daily panel cleaning resolves most seasonal flickering.
Q: My lights flicker right after a storm. Is that water damage?
Likely, yes. Open the housing and inspect for moisture. Dry thoroughly and reseal before testing. Upgrade to IP65+ rated fixtures to prevent recurrence.
Q: What does IP65 mean on solar light packaging?
IP65 means the fixture is fully dust-tight and protected against water jets from any direction. It is the minimum recommended rating for outdoor solar lights. IP67 adds protection against temporary submersion ideal for areas with heavy rainfall.
Q: How do I know if my solar panel is the problem?
Cover the panel completely and connect it to a multimeter in DC voltage mode under direct sunlight. A healthy panel typically outputs 5–6V in bright sun. A reading below 3V indicates the panel is failing and needs replacement.
Final Verdict: Fix the Flicker, Keep the Green
Flickering solar outdoor lights are almost always fixable. In the vast majority of cases, a fresh rechargeable battery and a clean solar panel restore steady, reliable performance instantly. Beyond that, systematic inspection of the sensor, wiring, moisture seals, and LED driver covers every remaining scenario.
Furthermore, consistent preventive maintenance monthly cleaning and annual battery checks eliminates most flickering problems before they even begin. Solar outdoor lighting remains one of the most cost-effective, eco-responsible illumination solutions available today.
Invest 30 minutes now. Consequently, enjoy years of flicker-free, energy-efficient outdoor light.
For more expert solar lighting guides, smart home automation insights, and eco-tech product reviews, exploreEcoPowerSence.com.

I Am Sarah Miller is a passionate writer focused on sustainability, eco-friendly living, and modern environmental solutions. Through her work, she aims to inspire readers to make smarter, greener choices for a better future. She regularly shares insights and practical tips on her website, ecopowersence.com.

1 Comment