A $35 solar motion light that claims “3,000 lumens” can look dimmer on your driveway than a $60 unit rated at 1,800 lumens. I’ve seen it repeatedly in 2025–2026 installs: the label sells lumens, but your eyes experience lux on target, beam shape, and how long the light can actually hold that brightness after a few cloudy days.
This guide is exactly what I wish existed when I outfitted my own garage and a small rental property with wireless solar LED security lights and learned the hard way which specs matter, which are marketing, and how to size a system so it still works in winter and monsoon season.
How solar motion security lights work (panel → battery → sensor → LEDs)
Most solar motion sensor flood lights are four subsystems bolted together:
1) Solar panel (energy in)
Most decent 2026 models use monocrystalline panels (better low-light performance than poly). The panel feeds a small charge controller; better units quietly run a mini MPPT (maximum power point tracking) algorithm. Cheap lights often use a basic linear controller and leave energy on the table, especially in hazy weather.
Insider tip: Panel size beats “LED count.” If the panel is smaller than your hand, the light might look great on day one and then fade after two cloudy days.
2) Charge controller + charging profile (battery protection)
Quality lights charge lithium packs with a CC/CV profile (constant current then constant voltage). Sloppy charging shortens battery life fast in hot climates.
3) Rechargeable battery (energy stored)
You’ll see capacity in mAh because it sells, but runtime depends on watt-hours (Wh). (I’ll show you how to convert in the specs section.) Battery chemistry matters a lot in heat and winter.
4) PIR motion sensor + LED driver (energy out, on demand)
A PIR sensor (passive infrared) with a Fresnel lens array detects changes in heat moving across zones. It’s not “seeing” you; it’s reading infrared changes. The LED driver then boosts current to the LED array for a timed burst (motion mode), or holds a low “standby” output in dim-to-bright modes.
Common mistake: People blame the PIR when the real issue is battery sag. When the battery is low, some lights still trigger, but they can’t drive full LED current—so you get a weak glow that feels like a sensor problem.
Key specs to compare in 2026 (and the minimum thresholds I use)
If you’re doing commercial investigation, here’s the framework I use before I recommend any outdoor solar security lighting system to a homeowner or small property manager.
Lumens vs usable illumination (beam angle matters more than you think)
Lumens are total light output. What you need is enough lux on the area you’re protecting.
A practical rule I use on site:
- Pathway / steps (motion-activated pathway and driveway lights, low glare): 100–300 lumens per fixture with a wide, soft beam
- Backyard / patio deterrence: 800–1,500 lumens
- Driveway / garage door / gate: 1,500–3,000 lumens (or two 1,200–1,800-lumen heads aimed to avoid harsh shadows)
- Perimeter flood / small lot corner coverage: 2,000–4,000 lumens with a controlled beam
Now the part most listings hide: beam angle. A “3,000 lumen” flood at 140° spreads light thin. A 2,000-lumen unit at 90–110° can look brighter on the ground because it concentrates light where you need it.
Actionable check today: When shopping, look for beam angle (90–120° for flood heads is usually ideal). If it’s not listed, treat the lumen claim as a soft number.
Bright solar floodlight lumens comparison: what I trust
I trust lumen numbers most when brands publish photometric testing aligned with IES LM-79 (output testing) and LED longevity aligned with LM-80 (lumen maintenance). Most consumer listings don’t show reports, but reputable brands at least reference test standards.
Battery: mAh is not the spec you want—Wh is
Convert like this:
- Wh = (mAh × V) ÷ 1000
Examples you’ll actually see:
- 3.7V, 10,000mAh pack ≈ 37Wh
- 3.2V (LiFePO4), 12,000mAh pack ≈ 38.4Wh
- 7.4V, 5,000mAh pack ≈ 37Wh (two cells in series)
My 2026 minimums (for real security use):
- Small walkway light: 15–25Wh
- Driveway/garage light: 35–60Wh
- Multi-head flood + long winter reliability: 60–120Wh (or split-panel with a larger battery box)
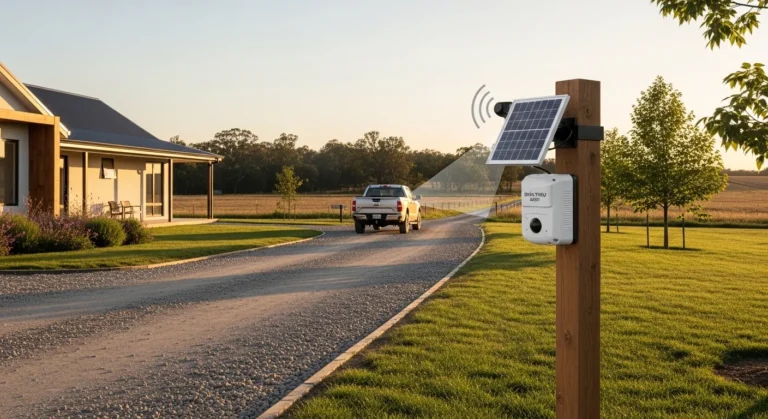
PIR sensor range + wide-angle motion sensor coverage
For PIR, two numbers matter: range (feet/meters) and angle (degrees).
Minimum thresholds I recommend in 2026:
- Range: 25–40 ft (8–12 m) adjustable
- Angle: 120–180° usable (not just claimed)
- Adjustable motion detection range and sensitivity: non-negotiable if you have pets, trees, or a nearby road
If you’re mounting above 9–10 feet, PIR can “see” less directly below. This is why I like dual-head designs with a slightly downward sensor tilt for garage doors.
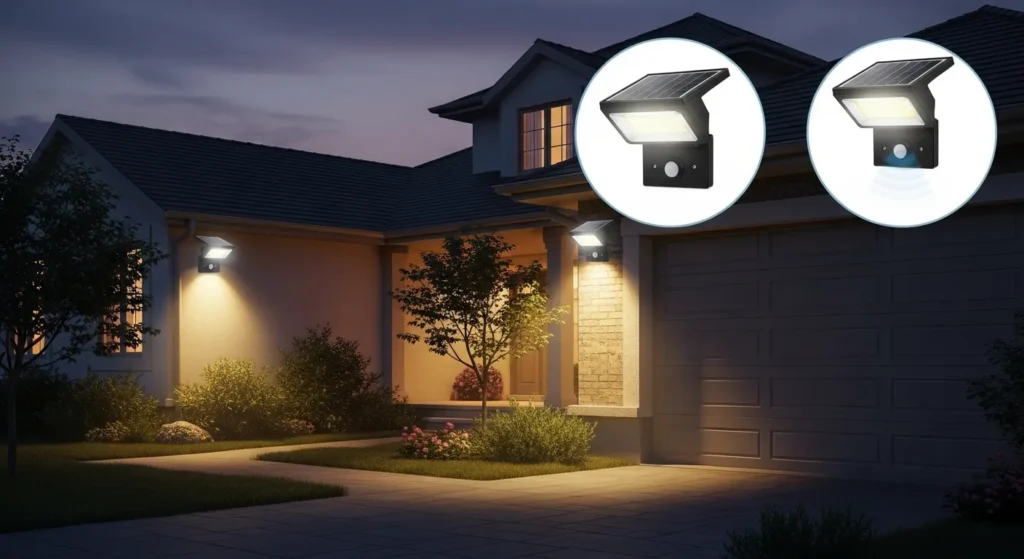
Color temperature (CCT) and why it changes deterrence
- 4000K neutral white: best balance; less harsh, good facial recognition on cameras
- 5000K daylight: looks “brighter,” can cause more glare and neighbor complaints
- 3000K warm: nicer on patios, but less “security” vibe
If you run cameras, I usually pick 4000K–5000K unless you have strong neighborhood light sensitivity concerns.
Weatherproofing: IP rating and materials
Look for weatherproof IP65 outdoor light fixtures at a minimum. IP65 (per IEC 60529) means dust-tight and protected against water jets. IP67 is better if the unit is exposed to driving rain or occasional submersion risk (ground-mount areas).
Also check:
- UV-resistant housing (cheap plastics chalk and crack in 1–2 summers)
- Stainless or coated fasteners (coastal corrosion is real)
Quick buy filter: IP65 + operating temp listed + mounting hardware included.
My 2026 comparison framework (minimum acceptable thresholds)
When I’m comparing models across price points, I won’t install a security light below these baselines:
- Panel: monocrystalline; if integrated, it should be roughly palm-sized or larger for anything over 1,500 lumens
- Battery: 35Wh+ for driveway/garage; 60Wh+ for winter-heavy regions
- Runtime: at least 200–300 motion activations/night at moderate brightness, or 2–4 hours equivalent on high (brands rarely state it clearly—more on my sizing score below)
- PIR: 120°+ angle and 25 ft+ range with sensitivity adjustment
- Ingress: IP65 minimum
- Mount: metal bracket or reinforced polymer; thin ABS-only mounts snap in wind
If a listing hides panel size, battery details, and IP rating, I assume it’s built to a price, not a job.
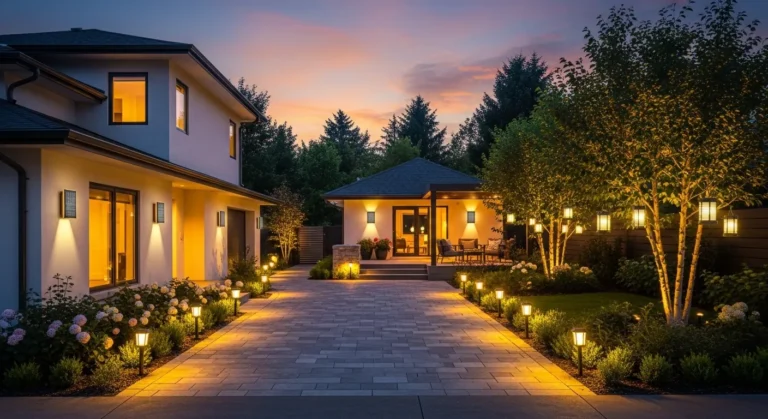
Placement & installation best practices (what changes performance the most)
I’ve installed these on stucco, brick, vinyl, and metal sheds. Placement mistakes cause 90% of “solar lights are junk” complaints.
Mounting height (my sweet spots)
- Pathway lights: 18–30 inches (stake lights) or 3–4 ft on posts
- Door/porch: 6–8 ft
- Garage/driveway flood: 8–10 ft is the best balance for coverage and detection
- Perimeter corners: 9–12 ft, but watch for detection dead zones directly below
Too high and your PIR loses sensitivity for close-in motion. Too low and you get more false triggers from pets.
Solar panel charging efficiency and placement (orientation + tilt)
The panel’s job is to harvest energy, not look tidy.
Rules I follow (works in the US and India alike):
- Avoid shade from 9am–3pm as much as you can
- Face the panel toward the equator (south-facing in the Northern Hemisphere)
- Tilt: roughly your latitude (or a bit steeper for winter performance)
For exact numbers, I’ll run the address through NREL’s PVWatts Calculator to estimate winter sun-hours. That’s more common on full PV systems, but it’s just as useful for solar lights when you’re sizing for worst-case weeks.
Shade checklist (do this today):
- Stand where the panel will sit at 10am, noon, 3pm
- Look for tree shadows, roof overhangs, balcony rails, water tanks
- Remember: winter sun is lower; shadows get longer
Avoiding false triggers (PIR physics in the real world)
PIR sees heat changes moving across zones. Common false triggers:
- Wind-blown bushes
- Hot air from dryer vents or AC heat pumps
- Passing headlights sweeping across the sensor
- Street traffic if the sensor faces the road
Fixes that actually work:
- Aim the sensor across the path of travel, not straight at it (PIR detects lateral movement better)
- Reduce sensitivity before you relocate the light
- Mask the sensor edge with the included hood (if provided) or adjust angle downward
Anti-theft solar light mounting options
Solar lights get stolen. I’ve had it happen once—my fault for using the included soft screws on a wooden gate post.
Better options:
- Use security Torx screws
- Mount on masonry with proper anchors
- Add a stainless safety cable loop inside the housing if there’s an internal screw boss
- Choose split-panel designs where the light head is high and the panel is harder to access
Installation tips for solar security lights: If you’re renting, use a mounting plate with 3M VHB + two discreet screws (when allowed) rather than just adhesive. Pure adhesive fails in heat and humidity.
Performance by climate & season (winter, shade, cloudy regions, monsoon)
Solar security lights don’t fail equally everywhere. The same model that’s fine in Phoenix can disappoint in Seattle in December or in Mumbai during monsoon weeks.
Winter and low sun-hours
Winter hits you three ways:
1) Fewer sun-hours
2) Lower panel angle to the sun
3) Cold reduces battery output (especially standard Li-ion)
Actionable solutions I’ve used:
- Pick dim-to-bright or dusk-to-dawn + motion boost modes, not motion-only
- Oversize battery (60Wh+) and panel (or split-panel)
- Clear snow/dust weekly from the panel surface
- Prefer LiFePO4 if you routinely see near-freezing nights; it handles cold and high cycle counts better in my experience
Cloudy regions and shade-heavy yards
If you’re in a cloudy microclimate, panel quality matters more than peak lumens. Monocrystalline plus better charge control can keep lights alive on marginal days.
India-specific viability (what I’ve seen work)
I’ve helped two clients source and place solar security lights for family homes in India in 2026 (one in Pune, one in coastal Kerala). The pattern was consistent:
- Pre-monsoon/summer: almost any decent IP65 unit works
- Monsoon weeks: motion-only modes die early unless the panel is oversized and kept clean
- Coastal air: cheap screws rust fast; mounts loosen in wind
India also has rising interest in rooftop solar in general. Programs like PM Surya Ghar Muft Bijli Yojana (MNRE) have pushed solar awareness into mainstream home upgrades, and I’ve noticed that spill over into more people trying solar lighting for gates and driveways. The catch: small solar lights are far more sensitive to placement and dust than rooftop panels because their energy budget is tiny.
My India-specific recommendation: If you expect weeks of cloud cover, treat these as a system: split panel + larger battery + dim-to-bright mode, and clean the panel more often in dusty cities.
Battery types & longevity (what lasts, what fails, what’s replaceable)
Li-ion (3.7V, often 18650) vs LiFePO4 (3.2V)
- Li-ion (often 18650 format): high energy density, common, cheaper; more sensitive to heat and high state-of-charge storage
- LiFePO4 (Lithium Iron Phosphate 3.2V): lower energy density but better cycle life and more stable in heat; my preference for year-round reliability
In my own installs, the lights that died first were sealed Li-ion packs cooked in summer sun with no airflow behind the panel.
Expected cycle life (realistic, not lab-perfect)
Real-world cycle life depends on depth of discharge, heat, and charge strategy:
- Li-ion: often 500–800 cycles to noticeable capacity loss in harsh outdoor conditions
- LiFePO4: commonly 1,500–3,000 cycles in better designs
If your light cycles every night, those numbers matter.
Replaceability: the feature nobody advertises clearly
A replaceable battery is a huge total-cost-of-ownership win. Many units are ultrasonically sealed. When the pack dies, the whole light becomes e-waste.
How to spot non-replaceable designs:
- No screw access panel
- No battery spec beyond “built-in”
- Warranty is only 12 months and excludes battery explicitly
What warranties usually cover (read this part):
Most brands treat batteries as consumables. A “2-year warranty” may only cover the housing/LED driver and give you 6–12 months on the battery. I always read the battery clause before I buy.
Smart/security features & controls (what’s worth paying for)
Modes that actually improve security
My favorite setup for most homes:
- Dusk-to-dawn low glow (10–50 lumens)
- Motion boost to 1,500–3,000 lumens for 20–60 seconds
This reduces the “pitch black until triggered” effect and helps cameras keep exposure stable.
Look for:
- Adjustable on-time (20s / 40s / 60s)
- Separate brightness control for standby vs boost
- Manual override
App/Wi‑Fi, Zigbee, Matter, and camera tie-ins (the honest take)
Wi‑Fi solar lights exist, but they’re finicky because Wi‑Fi idle draw is real. If you want smart control without killing runtime:
- Prefer Zigbee 3.0 or a Matter 1.3-compatible bridge when available
- For security ecosystems, I’ve had the best results pairing lights with camera motion zones (e.g., Ring cams triggering automations), but most solar lights can’t be hard-triggered by a camera without a smart relay or proprietary system.
If you’re deep in Amazon Alexa or Google Home / Nest, a smart plug won’t help (solar lights are self-contained). You’re mostly buying app scheduling and mode control—useful, but not essential.
Strobe/siren options
I only recommend strobe/siren for rural properties or detached sheds where neighbor complaints aren’t an issue. False alarms ruin trust fast.
My “Solar Security Light Sizing Score” (turn marketing into a nightly forecast)
Competitors rarely quantify the mismatch between panel, battery, and claimed lumens. So I use a simple sizing score to predict how many good triggers you’ll get after a couple of bad weather days.
Step 1: Estimate daily harvest (Wh/day)
Harvest ≈ Panel watts × sun-hours × 0.65
- Sun-hours: use PVWatts (US) or local insolation tables; for quick planning I’ll sanity-check with cloud cover patterns (NOAA for US; local met data elsewhere)
- 0.65 accounts for heat, angle, controller losses, dust
Example:
- 6W panel × 3 winter sun-hours × 0.65 ≈ 11.7Wh/day
Step 2: Estimate nightly use (Wh/night)
Use ≈ (Boost watts × boost time hours × triggers) + standby Wh
If your light boosts at ~12W for 30 seconds:
- 12W × (30/3600) ≈ 0.1Wh per trigger
200 triggers/night ≈ 20Wh plus standby.
Step 3: Score it
Sizing Score = (Harvest Wh/day + 0.5 × Battery Wh) ÷ Expected nightly use
- >1.2: reliable year-round
- 0.8–1.2: okay, but cloudy weeks will dim it
- <0.8: expect disappointment unless you change modes or add sun exposure
Actionable move: Ask, “What’s the panel wattage and battery Wh?” If a listing can’t answer, you can’t score it—and you’re buying blind.
Real-world buying guide (use-case picks + budget vs premium)
I’m not going to pretend there’s one “best” light for everyone. Here’s how I pick best solar security lights for yards and garages by scenario, using the specs above.
Driveway + garage door (most common)
What works best: Dual-head or triple-head solar motion sensor flood lights with adjustable PIR and dim-to-bright.
Targets:
- 1,800–3,000 real lumens (or two fixtures)
- 35–80Wh battery
- 120–180° PIR, 30–40 ft range
- IP65 minimum
Pitfall: Single-head “super bright” units often create hard shadows near cars. Two smaller heads aimed outward cover better.
Backyard/patio (security + comfort)
Look for:
- 3000K–4000K option
- Wide beam, glare control
- Standby mode so the yard isn’t black until motion
If you entertain outside, a warmer standby with a cool boost is ideal, but only some models offer it.
Shed, side yard, and gate
For gates, I prioritize:
- Fast trigger + adjustable sensitivity
- Anti-theft mounting (tamper-resistant screws)
- Split panel if the gate area is shaded
For a shed, I’ll often install two: one at the door, one at the corner, rather than chasing a single mega-light.
Budget vs premium (what you really buy with more money)
- **Budget ($20–
The Ultimate Guide to Choosing a Z-Wave Repeater Outdoor (2026 Buyers Guide)

I Am Sarah Miller is a passionate writer focused on sustainability, eco-friendly living, and modern environmental solutions. Through her work, she aims to inspire readers to make smarter, greener choices for a better future. She regularly shares insights and practical tips on her website, ecopowersence.com.